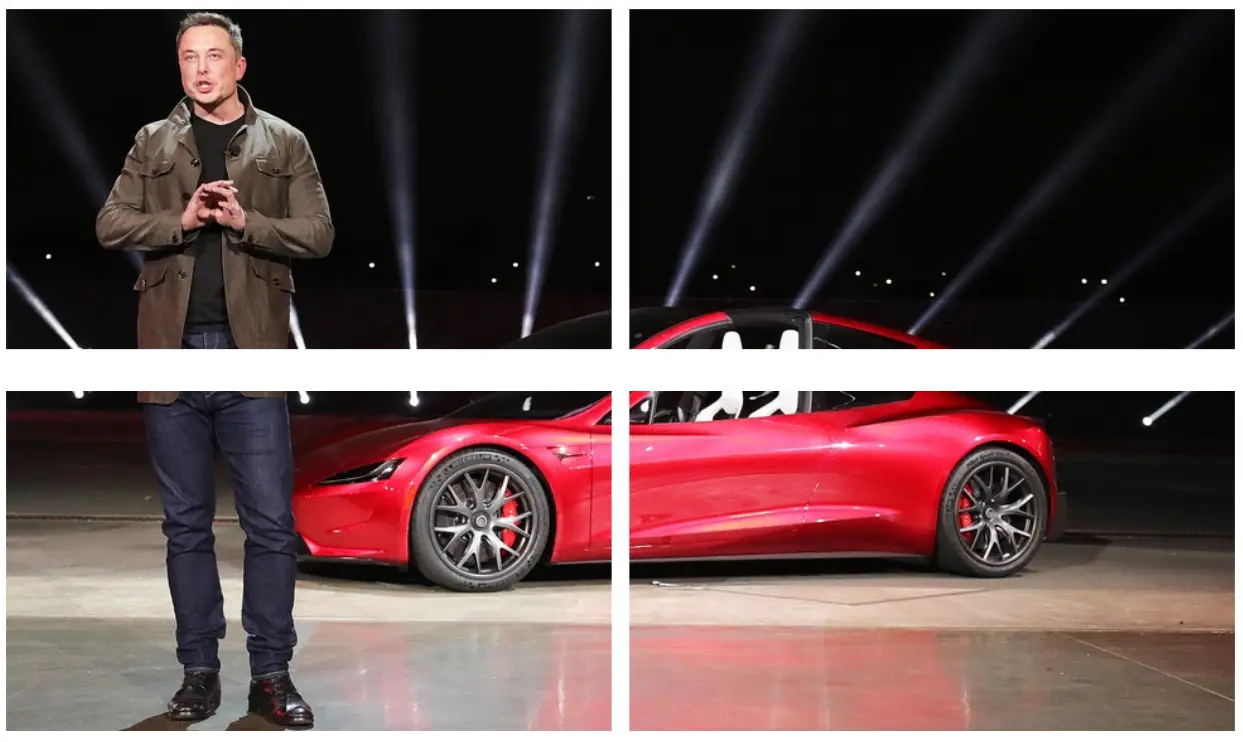
Hello Everyone, so I found an image of Elon Musk revealing his Tesla vehicle, and we are going to learn how to split the image into four pieces using OpenCV. Want to learn how to do it? Follow along.
Project Structure
Before we get started implementing our Python script for this tutorial, let’s first review our project directory structure:
 →
→ 1 2 3 4 5 6 | $ tree . --dirsfirst . ├── elon_musk_tesla.png └── opencv_manipulate_pixels.py 0 directories, 2 files |
The directory contains :
- Our Python script file
opencv_manipulate_pixels.py. - Our experimental image,
elon_musk_tesla.png.
Let’s now implement our opencv_manipulate_pixels.py Python script using OpenCV!
Implementing the OpenCV Manipulate Pixel Script
First, make a new script, naming it opencv_manipulate_pixels.py, and insert the following code:
1 2 3 4 5 6 7 8 | # import the necessary modules import argparse import cv2 # initialize the argument parser and establish the arguments required parser = argparse.ArgumentParser() parser.add_argument('--image', required=True, help='Path to the image') args = vars(parser.parse_args()) |
In Lines 2 – 3, we imported OpenCV to work with our sample image and the argparse library to execute our program via the command line. After the imports are provided, we then parse a single command-line argument:
-
--image, which is the path to where our image resides on disk.
11 12 13 14 15 16 17 18 | # load the image, get it's special dimensions (width and height), # then display the original image to our screen image = cv2.imread(args['image']) (h, w) = image.shape[:2] cv2.imshow('Original', image) # compute the center coordinate of the image (cX, cY) = (w // 2, h // 2) |
From there, we will instruct OpenCV to go and find the image "elon_musk_tesla.png," read it, and then store it in this variable “image”.
Then we can compute the center coordinate of the image by performing integer division using the double slash “//” operation, which python provides.
15 16 17 18 19 20 21 22 23 24 25 26 27 | # crop the image into four parts which will be labelled as # top left, top right, bottom left, and bottom right. topLeft = image[0:cY, 0:cX] topRight = image[0:cY, cX:w] bottomLeft = image[cY:h, 0:cX] bottomRight = image[cY:h, cX:w] # visualize the cropped regions cv2.imshow("Top Left Corner", topLeft) cv2.imshow("Top Right Corner", topRight) cv2.imshow("Bottom Right Corner", bottomLeft) cv2.imshow("Bottom Left Corner", bottomRight) cv2.waitKey(0) |
Moving on, to crop the image into four pieces:
- The top left
- The top right
- The bottom left, and
- The bottom right
We will use the NumPy slicing functionality called indexing. If you’re a bit rusty on NumPy, I’ve composed a detailed tutorial to bring you up to speed.
Then we will visualize each part of the image using the cv2.imshow command and cv2.waitKey, which prevents the windows from closing immediately until a key is pressed on your keyboard.
How to Override Our Image Pixels
To achieve the result shown in the image above, we need to learn about certain basics, such as extracting the pixel values at a certain region of our image. I’m sure you’ve already had a detailed look over NumPy. Cause if you haven’t, this section might get tricky for you.
23 24 25 26 27 28 29 30 | # manipulate the pixel value from the origin of the image (b, g, r) = image[0, 0] print(f"Pixel values at the origin (0,0) of the image - red: {r}, green: {g}, blue: {b}") # update the pixel at the center of the image, setting it to green image[0, 0] = (255, 255, 255) (b, g, r) = image[0, 0] print(f"Pixel values at the origin (0,0) of the image - red: {r}, green: {g}, blue: {b}") |
Moving on, let’s say we want to access an individual pixel value. Red, Green, and Blue pixel value, you’ll notice the ordering is in (b, g, r) instead of (r, g, b). Which looks a bit weird, right?
To clear that out, ever since OpenCV was developed over 21 years ago, OpenCV used the BGR format instead of the RGB format, which is popularly known today. And causing any change to this notation will surely cause a huge impact on lots of OpenCV applications built over the years.
Let’s see how we can extract the pixel values from specific coordinates in our image with that been cleared out.
Let’s say at coordinate (0,0). Noticed I used the index (0,0), which first represents:
- The row in pixel (that’s the height of the image) and, [y=0]
- The column in pixel (that’s the width of the image) [x=0]
Next, to override the original pixel, we need to create a new channel ordering in a tuple and set it to our desired color.
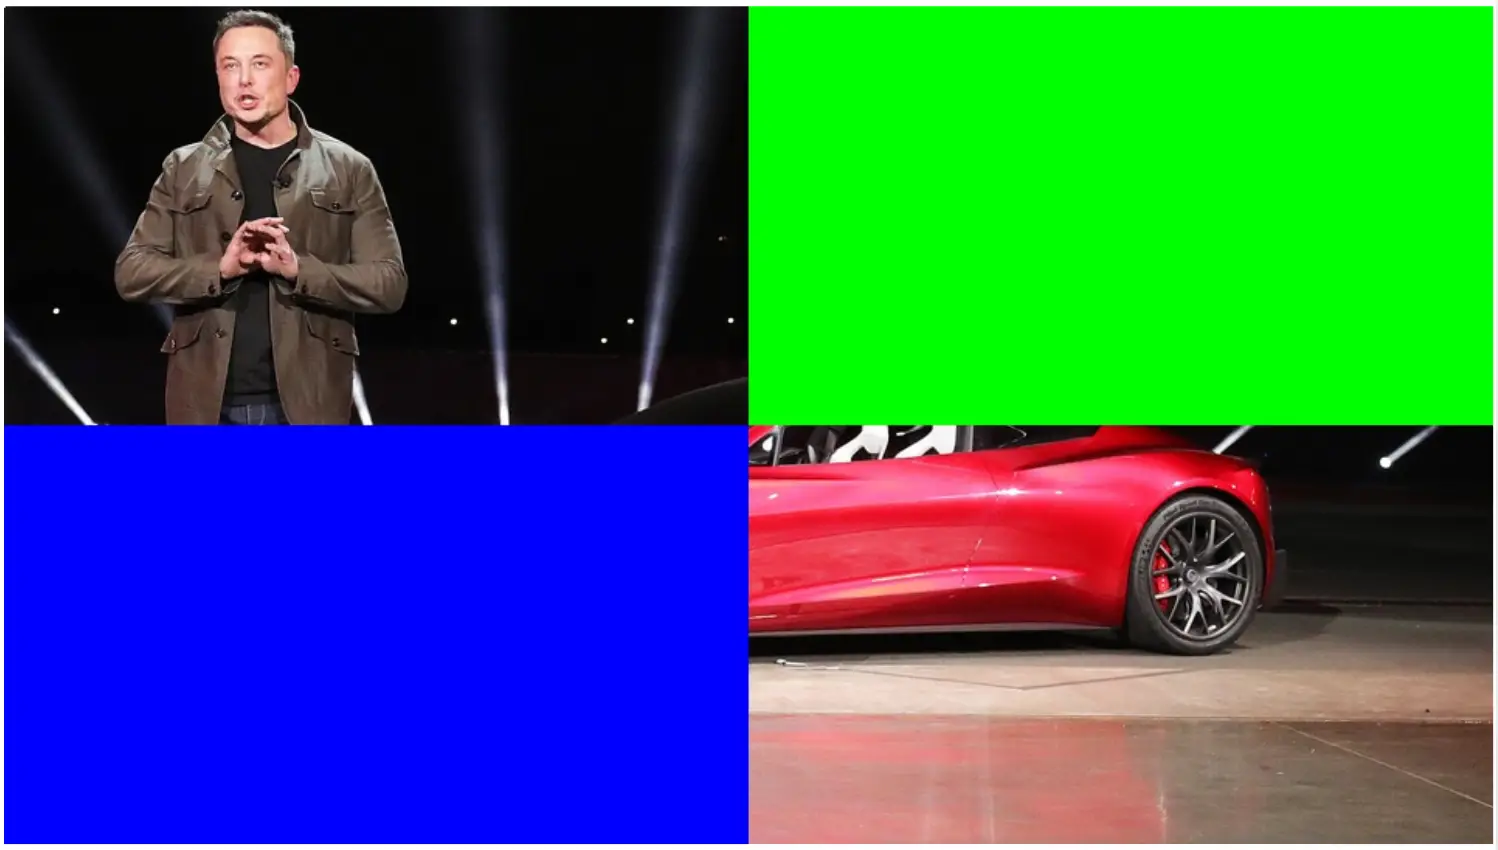
23 24 25 26 27 28 29 | # overwrite the bottom right to blue and and top right pixels to green image[cY:h, 0:cX] = (255, 0, 0) image[0:cY, cX:w] = (0, 255, 0) # Show our updated image cv2.imshow("Updated", image) cv2.waitKey(0) |
It’s a bit difficult to see what exactly has happened, so let’s perform the same operation on both the bottom left and top right sections of our image.
Then set the pixel values at the bottom left to blue and the whole part of the top right to Green.
Finally, we will show the image on the desktop and wait for a key to press the keyboard before closing the desktop GUI.
Displaying OpenCV Loaded Image
Please start by entering your email in the blue popup to retrieve the source code and example images from my private repository or sign up directly from using the link.
Now that’s implemented, it’s time to read our image from the disk using OpenCV and perform both cropping our original image; then manipulating the pixel value within a section of our image!
So, fire up your terminal, and execute the following command:
1 2 3 4 5 | $ python3 opencv_manipulate_pixels.py --image images/elon_musk_tesla.png $ $ Pixel values at the origin (0,0) of the image - red: 20, green: 20, blue: 22 $ Pixel values at the origin (0,0) of the image - red: 255, green: 255, blue: 255 $ |
Summary
This article has explained how to use OpenCV to split images using NumPy Indexing and slicing. Then also how to manipulate regional pixels of our split image.
What’s Next?
Now, what’s next? in the following tutorial, we will explore more functionalities the library OpenCV offers. Until then, share, like the video above, comment, and subscribe.
Further Reading
We have listed some useful resources below if you thirst for more reading.


