Hello Everyone, it’s David Praise and in today’s tutorial, we will learn how to load, and display images using OpenCV. Then we will explore how to extract spatial dimensions about our image.
If you don’t already have OpenCV installed on your computer, I’ve released a tutorial where I talked about mistakes I made installing OpenCV in the past; Including tips on how I could have avoided them.
After you have downloaded the library OpenCV and have its prerequisites installed, we will validate if our environment has been set up correctly by using the following steps.
We will first:
- Read an image from a folder
- Extract meaningful spatial dimensions from our image
- Display the image on the desktop for you to see
- Finally, then save the display image
Project Structure
Before we get started implementing our Python script for this tutorial, let’s first review our project directory structure:
 →
→ 1 2 3 4 5 6 7 | $ tree . --dirsfirst . ├── floppy_disk.jpg ├── load_image.py └── output.jpg 0 directories, 3 files |
The directory contains :
- Our Python script file
load_image.py. - Our experimental image,
floppy_disk.jpg. - The
output.jpgimage will be created on the fly while the script is being executed.
Let’s now implement our load_image.py Python script using OpenCV!
Implementing the OpenCV image loading script
First, make a new script, naming it load_image.py, and insert the following code:
1 2 3 4 5 6 7 8 9 | # import the necessary modules import argparse import cv2 # initialize the argument parser and establish the arguments required parser = argparse.ArgumentParser() parser.add_argument('--image', required=True, help='Path to the image') parser.add_argument('--output', default='output.jpg', help='Path to the output image') args = vars(parser.parse_args()) |
In Lines 2 – 3, we imported opencv to work with our sample image; and the argparse library to execute our program via the command line.
Then, on Lines 6 – 9, we insert our two argument:
-
--image, which is the path to where our image resides on disk. --output, which is the path to where our image will be stored. We also included a default output name, if nothing it isn’t specified through the command line.
11 12 13 | # load the image from where the file is located and get the # spacial dimensions such as the width, height and #no of channels image = cv2.imread(args['image']) |
From there, we will instruct OpenCV to go and find the image"floppy_disk.jpg", read it, and then store it in this variable “image”. Using the cv2.imread function.
15 16 17 18 19 20 21 | # grab and display the width, height and the #no of channels # the loaded image currently has, in the terminal window (iH, iW, iC) = image.shape[:3] print(f"Height: {iH} pixels") print(f"Width: {iW} pixels") print(f"No of channels: {iC}") |
Moving on, to get the spatial dimensions of the image I mentioned earlier, we can easily extract this information by calling the shape attribute.
As the program is executed, we will get the height and width in pixels, including the number of channels.
23 24 | # save the image directly to your current folder cv2.imwrite(args['output'], image) |
We can also save the new image using the default name, “output.jpg” which was specified in the output destination on Line 8.
Note: it’s the same as the loaded image, but OpenCV will save it on a different name in our current working directory.
You’ll see it in real-time as it’s been created when the program is running.
26 27 28 29 30 | # display the image and waits for any key to be pressed # then remove any created gui window from the screen & memory cv2.imshow('Image', image) cv2.waitKey(0) cv2.destroyAllWindows() |
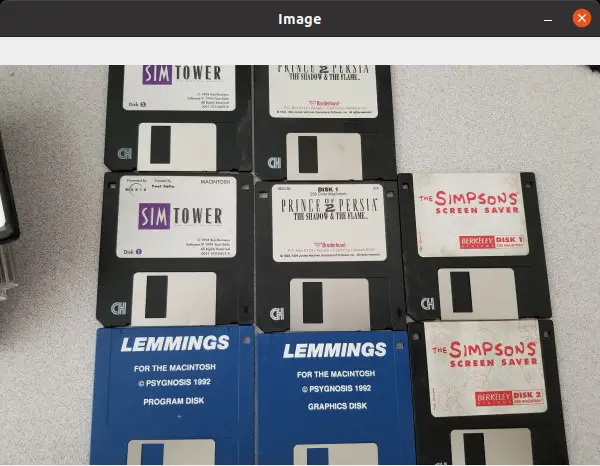
Finally, we will show the image by displaying the photo of many floppy disks on the desktop; wait for a key to be pressed on the keyboard before closing the desktop GUI.
Displaying OpenCV Loaded Image
Now that’s implemented, it’s time to read our image from the disk using OpenCV!
From there, fire up your terminal, and execute the following command:
1 2 3 4 5 | $ python3 load_image.py --image floppy_disk.jpg $ $ Width: 400 pixels $ Height: 600 pixels $ No of channels: 3 |
Bonus
Once you order OpenCV to perform a specific task, it might not find the image in most scenarios.
When building real-world applications, it isn’t a good practice to avoid constructing edge cases to avoid your entire application from crashing in production.
1 2 3 4 5 6 | $ python3 load_image.py --image ./floy_disk.jpg $ $ Traceback (most recent call last): $ File "load_image.py", line 18, in <module> $ (iW, iH, iC) = image.shape[:3] $ AttributeError: 'NoneType' object has no attribute 'shape' |
If we specified the wrong path to the image, we will either get a None or NoneType error, which could possibly be due to:
- An invalid path specified as an input, or
- The image might have been corrupted, or OpenCV didn’t load the image properly.
Of course, we don’t want this to affect the other procedures below these lines. Therefore give that a spot check without spending hours debugging what could have gone wrong.
Summary
This article has explained how to use OpenCV to load and display your image from a disk. Using:
cv2.imread: read the image from the disk after receiving the path to the picture.cv2.imshow: display the image on your screen.cv2.waitkey: wait for a keypress; otherwise, the window created usingcv2.imshowwill be closed immediately.
Finally, I also mentioned some common errors when loading your images from disk and how to build an edge case around that function.
What’s Next?
Now, what’s next? in the following tutorial, we will explore more functionalities the library OpenCV offers. Until then, share, like the video above, comment, and subscribe.
Further Reading
We have listed some useful resources below if you thirst for more reading.
- 3 Rookie Mistakes People Make Installing OpenCV | Avoid It!
- Why Google and Microsoft uses OpenCV
- A Simple Walk-through with NumPy for Data Science
- A Simple Walk-through with Matplotlib for Data Science
- Why is Python the most popular language for Data Science
- Linear Regression using Gradient Descent in Python


