In this tutorial, you’ll learn how to build your own NFT Search Engine using Python and OpenCV. We’ll first walk you through the concept behind image search engines on how they work, and finally, a guild on how to build your own algorithm using any dataset.
Then in the following tutorial, you’ll learn how to integrate this current solution into a Flask Web Application. Without further ado, let’s start by understanding what is an Image Search Engine.
Today’s tutorial is part one in our two-part series of building an NFT Search Engine using Python, OpenCV and Flask:
- Building an NFT Search Engine in 3 steps using Python and OpenCV (this tutorial)
- Adding a web interface to our NFT Search Engine with Flask (next tutorial)
The Inspiration
I remember when the NFT business started booming back in 2021. Hearing about how people were flipping a single piece of digital art that looked worthless to me (at that time) – making millions of dollars out of these digital paintings was ridiculous.
One afternoon, while scrolling through Instagram, I spotted a painting that sold for a huge amount of money. I’m talking about millions of dollars. Since I was moving at a fast pace, I couldn’t remember the same profile avatar I saw. However, the only memory I had left of it was a screenshot I had taken months ago.
I would have shown you; however, I had already de-cluttered my gallery months ago.
During that time, I searched through the Openseas website to see if I could search for the name of the image by similarity uploading a look-alike image. I guess I wasn’t lucky to find that feature embedded within their system.
As they didn’t have that feature at that time and until now, I decided to implement a simple solution to help me solve the problem I faced months ago; that’s why I decided to work on this project and implement the best solution with little dataset I got.
A few of the issues I had while implementing this project was getting the dataset I needed. Unfortunately, I tried applying for their API keys to let me scrape the image, yet until now, I haven’t heard from them. Then, I decided to download those images manually. What a painful experience. Isn’t it?
By the end of this tutorial, you’ll learn how I built this Search Engine from the ground to the top. No hidden details.
Before we dive into the explanation of the procedure of this algorithm, let’s first get a good understanding of what I meant by an Image Search Engine.
You can think of this application as a process that takes one query image as an input and retrieves a collection of images similar to the query image. Like the same way Google search works. Once you ask a question and get multiple results based on what you search. It’s the same procedure, but this is in the form of using images.
Dataset
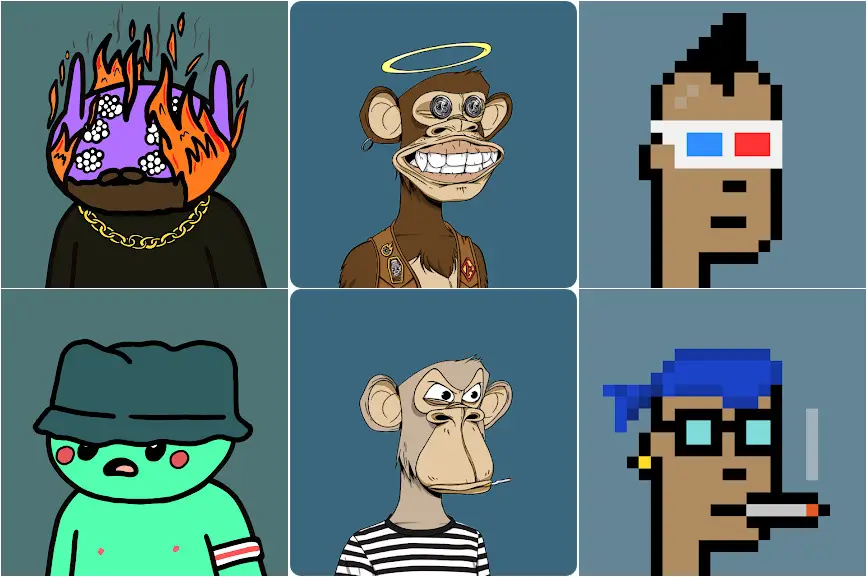
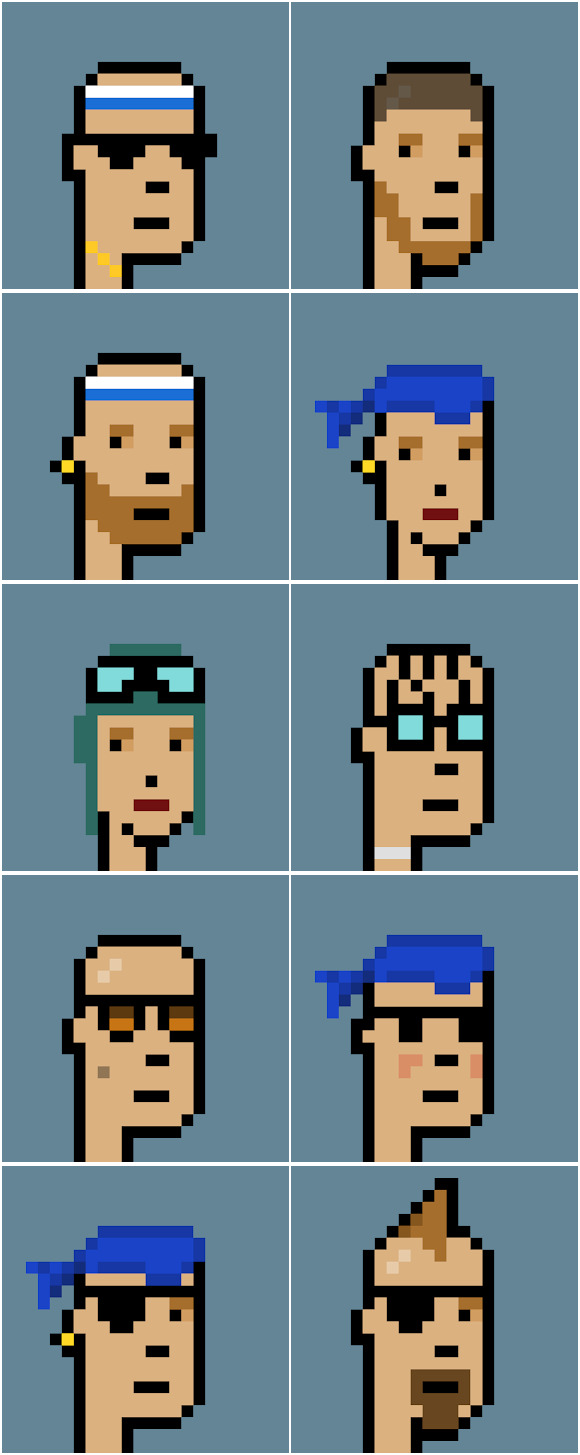
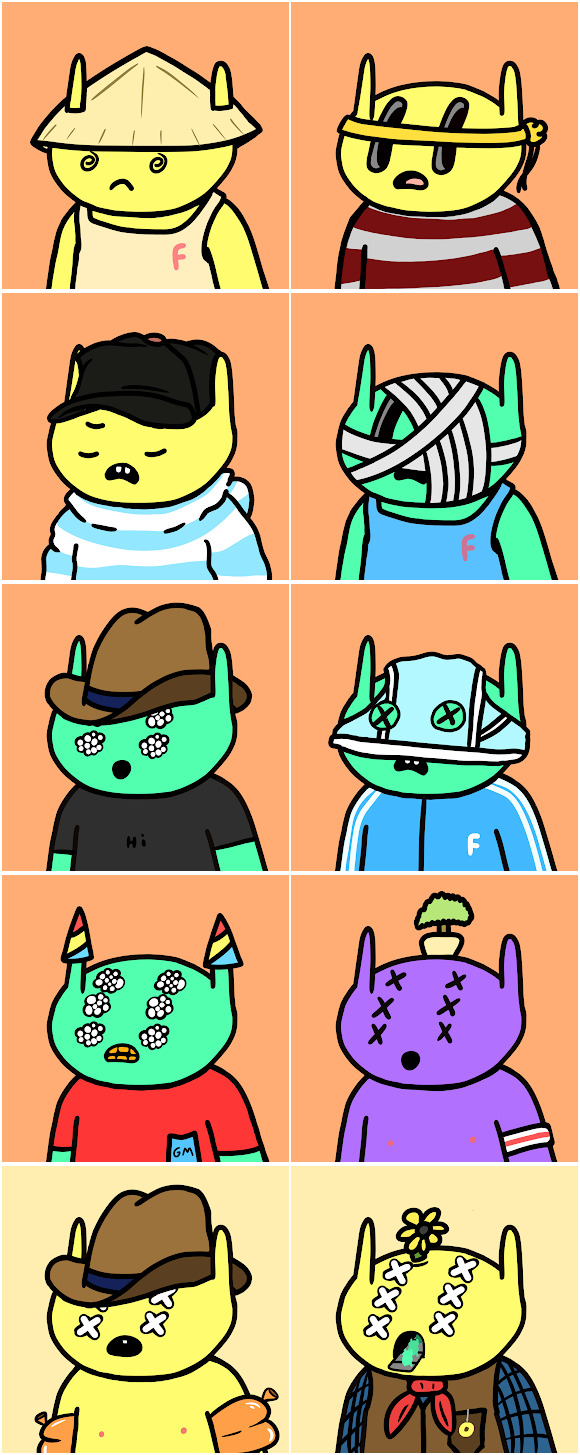
For this tutorial, we will utilize the images I manually scraped from the OpenSeas website (a market place where you could purchase NFTs) which contains a bunch of NFT profile avatars. The downloaded ones are:
- Bored Apes
- Cryptopunk, and
- Alien Frens
Let’s have a look at what these downloaded samples look like:
Configuring your Development Environment
Before we get started programming, to follow this tutorial successfully, you’ll need to have OpenCV installed on your system environment or in a virtual environment.
Good thing you don’t have to worry too much about OpenCV’s installation, as I’ve covered them in this tutorial here. Mostly for Linux users. You can easily pip install them, and you’re ready to go.
Project Structure
Before we get started implementing our Python script for our NFT search engine with Python and Opencv, let’s first review our project directory structure:
 → Click here to download the code
 1 2 3 4 5 6 7 8 9 10 11 12 13 14 15 16 17 18 | $ tree . --dirsfirst . ├── dataset [3 categories, 300 images] ├── neuraspike │ ├── __init__.py │ ├── descriptor.py │ ├── searcher.py │ └── utils.py ├── output │ └── features.csv ├── queries │ ├── test_alien_frens.png │ ├── test_crypto.png │ └── test_monkey.png ├── extract_features.py └── search.py 4 directories, 10 files |
Inside the neurapsike module, we have four Python scripts we’ll be implementing:
descriptor.py:Our color histogram descriptor.searcher.py:Holds the functions for comparing indexing images.__init__.py:Lets the Python interpreter know the directory contains code for a Python module and acts as a constructor for theneuraspikepackage.utils.py:Helps loads the images from the directory and extract the filename from each document.
The extract_features.py file is our training script. It will:
- Load all the images in the folder into the computer’s memory
- Extract relevant features from each image
- Then store the extracted features into a database (CSV file)
The search.py file is our query script. It will:
- Load the query image
- Perform the same features extraction done during the training step on the query image.
- Index all the images similar to the query image.
- Then return the list of ranked results in order of importance.
Now we have all these details cleared out, let’s start coding!
Implementing the NFT Search Engine Script
First, make a new script inside the neuraspike folder, naming it utils.py
1 2 3 4 5 6 7 8 9 10 11 12 13 14 15 16 | # import the necessary library import os def load_images_from_folder(folder): # load all the images within a folder into memory image_list = [] for filename in os.listdir(folder): path = os.path.join(folder, filename) image_list.append(path) return image_list def extract_filename(path): # extract the filename from an absolute path return os.path.basename(path) |
We begin by importing our required Python packages os which provides functions for interacting with the operating systems (Line 2).
The load_images_from_folder function accepts a single parameter which is the path to the directory our images are stored. This iterates through all the images found within the specified folder, builds and return all relative path to the images (Lines 4 – 11).
Also the extract_filename function accepts one parameter as an input. As an input, it receives the full path to each image and for the return, it provides the filename, excluding the outer paths (Lines 14 – 16).
Take for example, you have a relative path "./dataset/test_cryptopunk.png" the output will be "test_cryptopunk.png".
__init__.py
Within the __init__.py file, copy and paste the following code into your script to enable you to utilize the functions built within the neuraspike package.
1 2 3 4 5 6 7 8 9 | # author: David Praise Chukwuma Kalu # website: //www.neuraspike.com # import the necessary packages from .descriptor import extract_color_histogram from .searcher import euclidean_distance from .searcher import perform_image_search from .utils import extract_filename from .utils import load_images_from_folder |
Defining our Image Descriptor
To successfully build our NFTs Search Engine, we’ll rely mostly on the color histograms (i.e., the color distribution of an image) to help quantify each image. Since with the assumption that images with similar color distribution, even though the contents are different, will be considered the same.
Let’s code our descriptor.py file in the neuraspike module:
1 2 3 4 5 6 7 8 9 10 11 12 13 14 15 16 17 | # import the necessary library import cv2 def extract_color_histogram(image, bins=(8, 8, 8)): # extract a 3D color histogram from the LAB color space using # the supplied number of `bins` per channel lab = cv2.cvtColor(image, cv2.COLOR_BGR2LAB) histogram = cv2.calcHist([lab], [0, 1, 2], None, bins, [0, 256, 0, 256, 0, 256]) # normalizing the histogram cv2.normalize(histogram, histogram) # get the flattened histogram as the feature vector histogram = histogram.flatten() return histogram |
We begin by importing our required Python packages, cv2, for our OpenCV binding (Line 1).
Moving on, we convert the default color space of our image (that’s the standard RGB – BGR in this case) to the L*A*B space as it has more perceptual meaning compared to the RGB color space (Line 7).
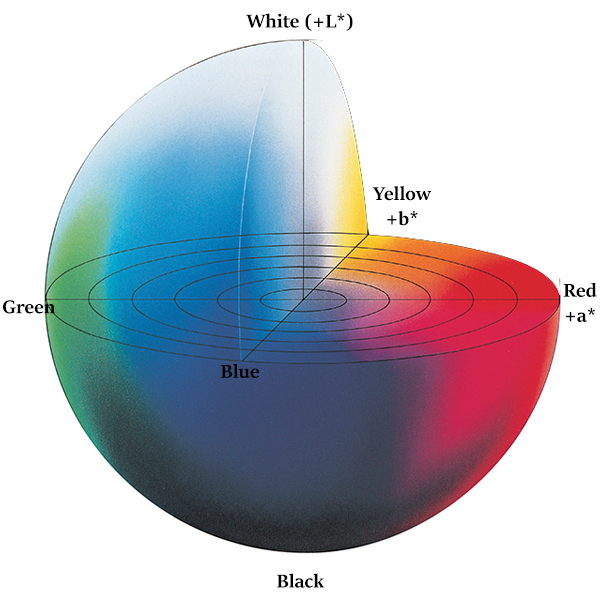
Besides another valuable piece of information about the LAB space, it has three components and doesn’t only encode the brightness compared to the RGB space.
The three components it contains are:
- L – Lightness (Intensity): It’s independent of color information and only encodes brightness.
- A – color component that ranges from Green to Magenta.
- B – color components that range from Blue to Yellow.
Based on this information, we can then rely on the euclidean distance to compute the difference between the query image and other image samples.
Next, we calculate the image’s histogram by making the call to cv2.calcHist using the supplied bins from the default parameter settings (Lines 7 – 8).
Then on Line 12, our color histogram is normalized and converted into a feature vector (Line 15).
Note: One great thing about using the color histogram is that your images can vary in size since your output feature vector will always be the number of bins in the histogram.
Feature Extraction from Our Dataset
After implementing our image descriptor, the next steps are to extract features (i.e., color histograms) of every available image and store the result in a database. That’s the features.csv file.
The format of the output should look like this:
>>> [filename, feature vector] -> [102256.jpg, 0.8, 0.2, 0.5, ….., 0.21].
Here, we have the filename, followed by the flattened color histogram each row.
To extract features from the NFT profile avatars we’ve scraped from the internet, open up a new file naming it extract_features.py and insert the following code:
1 2 3 4 5 6 7 8 9 10 11 12 | # import the necessary libraries import neuraspike as ns import argparse import cv2 # setup the argument parser and parse the arguments ap = argparse.ArgumentParser() ap.add_argument("-d", "--dataset", required=True, help="path to the dataset", type=str, default="./dataset") ap.add_argument("-i", "--index", required=True, help="Path to where the featured will be stored") args = vars(ap.parse_args()) |
We begin by importing our required Python packages, namely argparse, cv2(Opencv binding), and neuraspike module.
Next, our script accepts two command-line arguments:
--dataset:The path to the folder filled with photos of different NFT avatars.--index:The path to store the output of the CSV file contains the filename and its associated features in each image.
Now that we’ve handled the imports in our command line, let’s perform indexing on all images in the dataset folder:
14 15 16 17 18 19 20 21 22 23 24 25 26 27 28 29 30 31 32 33 34 35 36 37 | # grab the list of images that we'll be describing print("[INFO] loading images...") image_paths = ns.load_images_from_folder(args["dataset"]) # initialized the features matrix and labels features = [] labels = [] # loop over the input images for image_path in image_paths: # load the image from the dataset folder and extract the class # labels from the filename. Suppose the path is described as # ./dataset/{Class name}.{image number}.jpg image = cv2.imread(image_path) image_id = ns.extract_filename(image_path) # extract the colors in the histogram that explains the distribution # of colors within each pixel in all the images within the dataset histogram = ns.extract_color_histogram(image) histogram = histogram.tolist() # save the histogram along with the image name features.append(histogram) labels.append(image_id) |
On line 14, we will generate a list of paths to all the images in the dataset folder and initialize an empty list of features and labels; that’s where each extracted feature from the image and filename will be stored (Lines 19 – 20).
Then for each image path stored in the list of image_paths, we will:
- Load the image into memory (Line 27).
- Extract the filename, using it as a universally unique identifier (UUID) (Line 28).
- Apply our image descriptor to the loaded image, then extract the features from the image, converting the histogram to a list (Lines 32 – 33).
- Finally, we will then populate the empty features and labels lists which we defined earlier (Lines 36 – 37).
40 41 42 43 44 45 46 47 48 49 50 51 52 | # open the output CSV file for writing csv_writer = open(args["index"], "w") # iterate through the labels & features then store the # output in a CSV file for (image_id, image) in zip(labels, features): feature = ",".join([str(data) for data in image]) csv_writer.write("{},{}\n".format(image_id, feature)) # close the CSV file print("[INFO] saving features and model...") csv_writer.close() print("[INFO] Process completed...") |
After the histograms are computed for all images, we saved the image filename and its associated feature vector into a CSV file (Lines 41 – 51).
Once you have this implemented, open up your terminal, navigate to the directory where your code lives, and issue the following command:
1 2 3 4 5 | $ python extract_features.py --dataset ./dataset/ --index ./output/features.csv $ [INFO] loading images... $ [INFO] saving features and model... $ [INFO] Process completed... $ |
The Searcher
Now that we have all the features extracted from the images in our database, we need to implement a method that allows us to search through our dataset folder.
With that said, open up a new file, name it searcher.py, and insert the following:
1 2 3 4 5 6 7 8 9 10 11 12 13 14 15 16 17 18 19 20 21 22 23 24 25 26 27 28 29 30 | # import the necessary libraries from scipy.spatial import distance as dist import numpy as np def perform_image_search(query_feature, file_path, limit=10): # initialize the query result dictionary where the outputs will be stored query_results = {} # loop over the rows in the data split file for row in open(file_path, 'r'): # extract the class label and features from the row row = row.strip().split(",") filename = row[0] # get the filename features = np.array(row[1:], dtype="float32") # get the features distance = euclidean_distance(query_feature, features) query_results[filename] = distance # sort the output based on the most relevant images at the first # of the list (i.e from the smallest to the largest distance) then # limit the result which will be returned query_results = sorted(query_results.items(), key=lambda value: value[1]) query_results = query_results[0:limit] return query_results def euclidean_distance(query_image, image): return dist.euclidean(query_image, image) |
After importing our packages, let’s define a function perform_image_search to compare our query image feature vector among all the other vectors saved in the CSV file populated earlier.
On line 8, a query_result dictionary is initialized to store the output results.
From lines 11 – 18, we loaded the CSV file, iterated through each row while keeping track of the filename and its associated feature vector. Then compute the distance between the query image, and the saved feature vector (from the CSV file) using the euclidean distance.
Then, Lines 23 – 24 sorts the populated dictionary based on the most relevant image – the first item on the list being the closest image to the query image. And using the limit parameter, we control the number of outputs to be displayed to the user.
Performing the Search
The time has come to put our NFT Search Engine to the test. So let’s open a script called search.py and insert the following code below:
1 2 3 4 5 6 7 8 9 10 11 12 13 | # import the necessary libraries import neuraspike as ns import argparse import cv2 # setup the argument parser and parse the arguments ap = argparse.ArgumentParser() ap.add_argument("-d", "--query", required=True, default="--query", help="path to the query image") ap.add_argument("-i", "--index", required=True, help="Path to where the featured will be stored") ap.add_argument("-r", "--dataset", required=True, help="Path to the dataset folder") args = vars(ap.parse_args()) |
We began importing our required Python packages (Lines 2 – 4). Then, we parsed our command-line arguments (Lines 7 – 13).
The command-line arguments in our search.py script requires three arguments:
--dataset:The path to the query image.--index:The path to where the features are stored. That’s the CSV file.--dataset:The path to the download NFTs database.
Okay, time to perform the actual search:
16 17 18 19 20 21 22 23 24 25 26 27 28 29 30 31 32 33 34 35 36 37 | # grab the image we want to search for convert from, BGR to LAB space # then extract the color histogram which will be used to describe the # query image and perform search among all the other dataset print("[INFO] loading images...") image = cv2.imread(args["dataset"]) query_image = ns.extract_color_histogram(image) print("[INFO] Searching for similar images...") result = ns.perform_image_search(query_image, args['index'], limit=10) # display the query image cv2.imshow("Query Image", image) # iterate through the results print("[INFO] Displaying similar images...") for (image_id, score) in result: # load the image and display the output image_path = f"{args['resultPath']}/{image_id}" query_result = cv2.imread(image_path) cv2.imshow("Result", query_result) cv2.waitKey(0) |
First, we load the query image from the disk (line 20) and then grab the image’s color histogram (line 21).
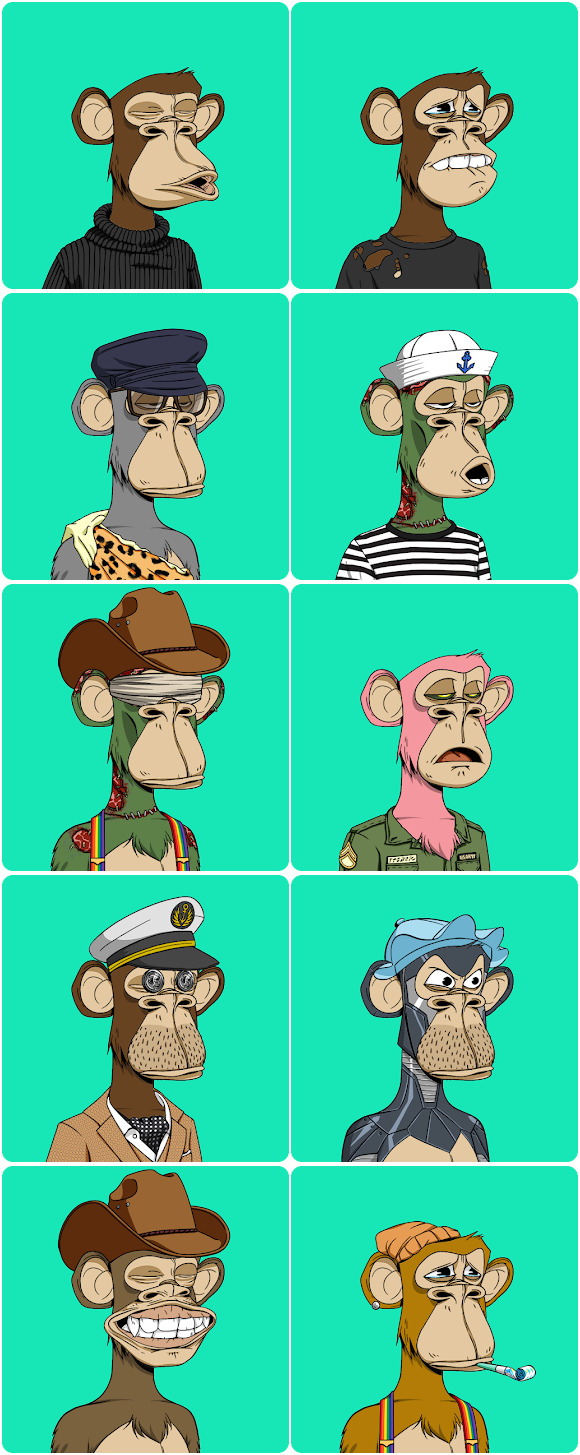
Then to find similar images (i.e., color-wise) among other images within the datasets folder, a call to the perform_image_search function is made (line 24), which returns a limited number of images based on the set limit of the parameter.
Lastly, the query image is displayed on our screen (line 27), along with the return of similar results (Lines 31 – 37).
Up and Running Color-Based Search Engine
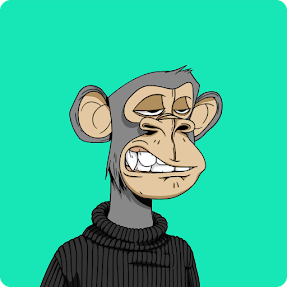
Let’s put our NFTs (Color-Based) Search Engine to the test. Open up a terminal and launch the search.py script with the following commands:
1 2 3 4 5 | $ python search.py --query ./queries/bored_ape.png --index ./output/features.csv --dataset ./dataset $ [INFO] loading images... $ [INFO] Searching for similar images... $ [INFO] Displaying similar images... $ |
1 2 3 4 5 | $ python search.py --query ./queries/cryptopunk.png --index ./output/features.csv --dataset ./dataset $ [INFO] loading images... $ [INFO] Searching for similar images... $ [INFO] Displaying similar images... $ |

1 2 3 4 | $ python search.py --query ./queries/alien_frens.png --index ./output/features.csv --dataset ./dataset $ [INFO] Searching for similar images... $ [INFO] Displaying similar images... $ |

Guild to Building our Color-Based Image Search Engine.
For this NFT (color-based) Image Search Engine we built, it boiled down into these four distinct steps:
- Defining your image descriptor: At this stage, we need to select the aspect of the image we want to describe, which is the image’s color. It could be a different portion of the image or the entire image itself.
- Indexing your dataset: As we have our image descriptor defined, our next task is to apply this procedure to each image in our datasets, extract all the essential features from these images, then write the features to data storage. For this tutorial, we’ve stored them using CSV files so we can use them for similarity comparison.
- Defining your similarity metric: Once all the features vectors are extracted, we need to determine how we will compare these vectors using a defined metric. However, the similarity metrics must be chosen carefully based on the dataset’s type and extraction process. Some options are Euclidean distance, Cosine distance, chi-square distance, e.t.c. It depends on the algorithm you’re using to quantify your collection of images.
- Searching: The step where we perform is the actual step required, and an individual will submit a query image which:
- Extract the features from the query image
- Apply the similarity function,” the euclidean distance,” which will compare all the features extracted from the query image and all the features already indexed.
- Then finally, return all the most important results based on the similarity function chosen.
Summary
In this tutorial, you learnt how to build your own NFT Search Engine using Python and OpenCV. We learnt about:
- Defining our image descriptor which helps quantify each image
- How to extract features from each image in our database.
- And how to perform a quick search to get all images which are similiar to the query image.
What’s Next?
Now, what’s next? in the following tutorial, we will learn how to build a web application for our NFTs Search Engine to make it easier to upload an image and return all the images
Further Reading
We have listed some useful resources below if you thirst for more reading.
- Adding a web interface to our NFT Search Engine in 3 steps with Flask
- Content-based image retrieval, wikipedia.
- 3 Rookie Mistakes People Make Installing OpenCV | Avoid It!
- Why is Python the most popular language for Data Science
- A Simple Walk-through with NumPy for Data Science
- Training an Emotion Detection System using PyTorch
- Real-time Emotion Detection System with PyTorch and OpenCV


